DIY July -- Recover Chairs with Curtains
For the first installment of my DIY July series, I enlisted the help of my mom and my friend Renea in recovering my sad, old, badly cat-scratched dining chairs.
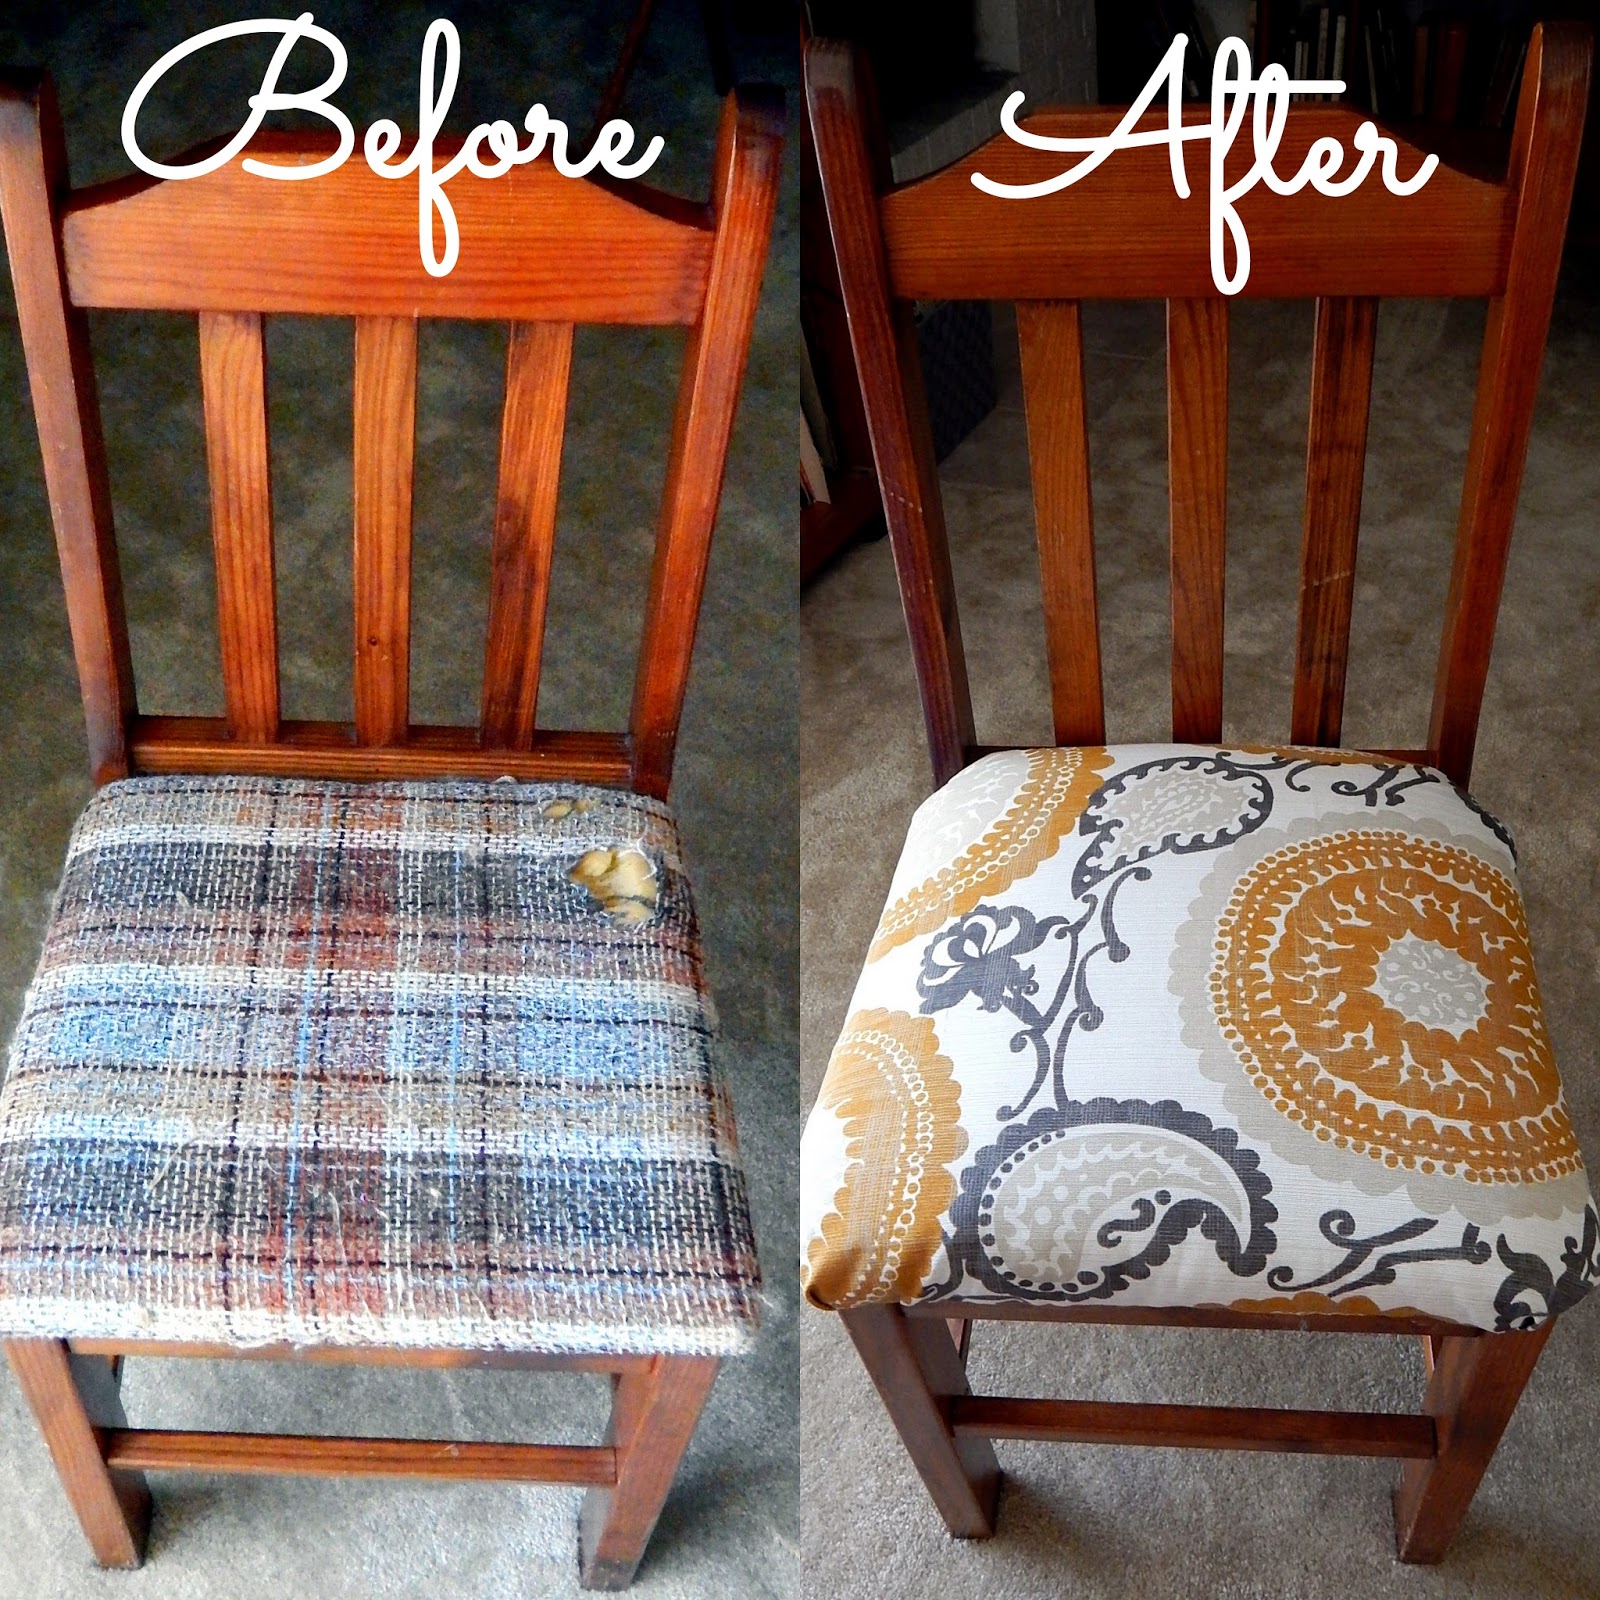
Here's what they looked like before:

First, we shopped for supplies. We already had a screwdriver and a staple gun. Now we just needed some extra padding (because these old chairs were worn down and uncomfortable) and some beautiful fabric. There aren't any fabric stores near me, and I wasn't sure I'd be able to find something I liked anyway, so I started thinking outside the box for covering material, and found this beautiful, sturdy curtain from Target. One 84" curtain would have covered about 5 chairs. I only needed to cover three, so I ended up with a matching table runner, too, after we hemmed up the leftover edge. We bought the cheapest bag of ordinary stuffing from Michaels. We could have spent more on something thicker and more cushy, but we figured anything was an improvement over what I had, and I wanted to save money.

After all our supplies were assembled, we took the chairs apart by unscrewing the base of the chairs from the seat. The bottoms of my chairs looked complicated, but they were simple -- only three screws had to come out, and then the chair base lifted easily off of the seat.

Next, we used the old cushions to measure and cut out our fabric pieces. (Well, my mom did all the cutting. She's the expert, after all.) We made sure to leave a little extra for the additional cushioning. We just covered right over the old covers, but if you needed to, you could pull out the staples holding the old covers on and remove the old covers. These 40-year-old chairs covers were holding pretty firmly, though, so we didn't want to go to the trouble. (Plus all the cat hair made extra cushioning :))

Then, we added a layer or two of stuffing, and put the stuffing and the cushion on top of the fabric, just like we were getting ready to wrap a cushiony present.

We folded the sides over, pulled tight, and stapled. Not all of our staples went in all the way, so Renea used a hammer to pound them into place.

The corners took a little more care. We had to fold the sides of the fabric under to make a smooth corner, kind of like the end of a wrapped present. Sometimes we had excess fabric and had to cut some of it off to make a smoother fold and a thinner surface to staple into.

After that was finished, we just lined up the chair base with the original holes and screwed it all back together.

And -- ta da! -- pretty, cushiony chairs, about a billion times better than what they were before.

Including the time we took to undo and recover one of the chairs in order to add more stuffing, the whole project only took 45 minutes with the three of us working together. Together, the curtains and stuffing cost me $25. The labor and borrowed staple gun cost me a few drinks and some popcorn. :)
I'm so pleased with how this long-delayed project turned out. A big thanks is due to my mom and Renea for making the process so easy!


Comments
Post a Comment
Thanks for leaving your kind and thoughtful comments.